
Ah, venison – the sovereign of the supper table, the marquee of meats!
Welcome to your venison cooking guide, where Michigan-based maestro chef Evan Barrett imparts his sage wisdom to transform that noble cut into a spectacular dish.
Remember: the journey to that perfect slice of venison involves more than just time on the grill. It’s an art form where attention to detail reigns supreme.
So, grab your digital thermometer, and let’s make every bite a testament to your grill mastery.
Key Takeaways
- Warm up to greatness – bring that venison backstrap to room temperature for an evenly cooked masterpiece.
- Trust is key – your digital thermometer is your faithful squire in this noble quest for precision.
- 125° to 130° F – engrave these numbers in your culinary crest for a medium-rare marvel.
- Master the rest – like the finest symphonies, proper rest between the acts is crucial for a standing ovation.
- Kitchen bravery – pulling the backstrap at 120° F, you’ll embrace carryover cooking and claim your rightful throne as the venison victor.
Preparing Venison for the Grill
Grilling venison, a prized pastime for many culinary enthusiasts, begins with the preparation that sets the stage for a beautifully cooked meal.
You might not think the pre-grill steps are as crucial as the actual grilling, but, oh dear reader, this is where the magic starts—before the flames are even in sight.
Step 1: Bringing Venison to Room Temperature
Let your venison sit elegantly until it reaches room temperature. A little ritual ensures that the heat from the grill spreads evenly through the fibers.
For those petite cuts shy of 2 inches, consider keeping them cool. A straight path from fridge to grill will guard the interior from the potential brutality of overcooking.
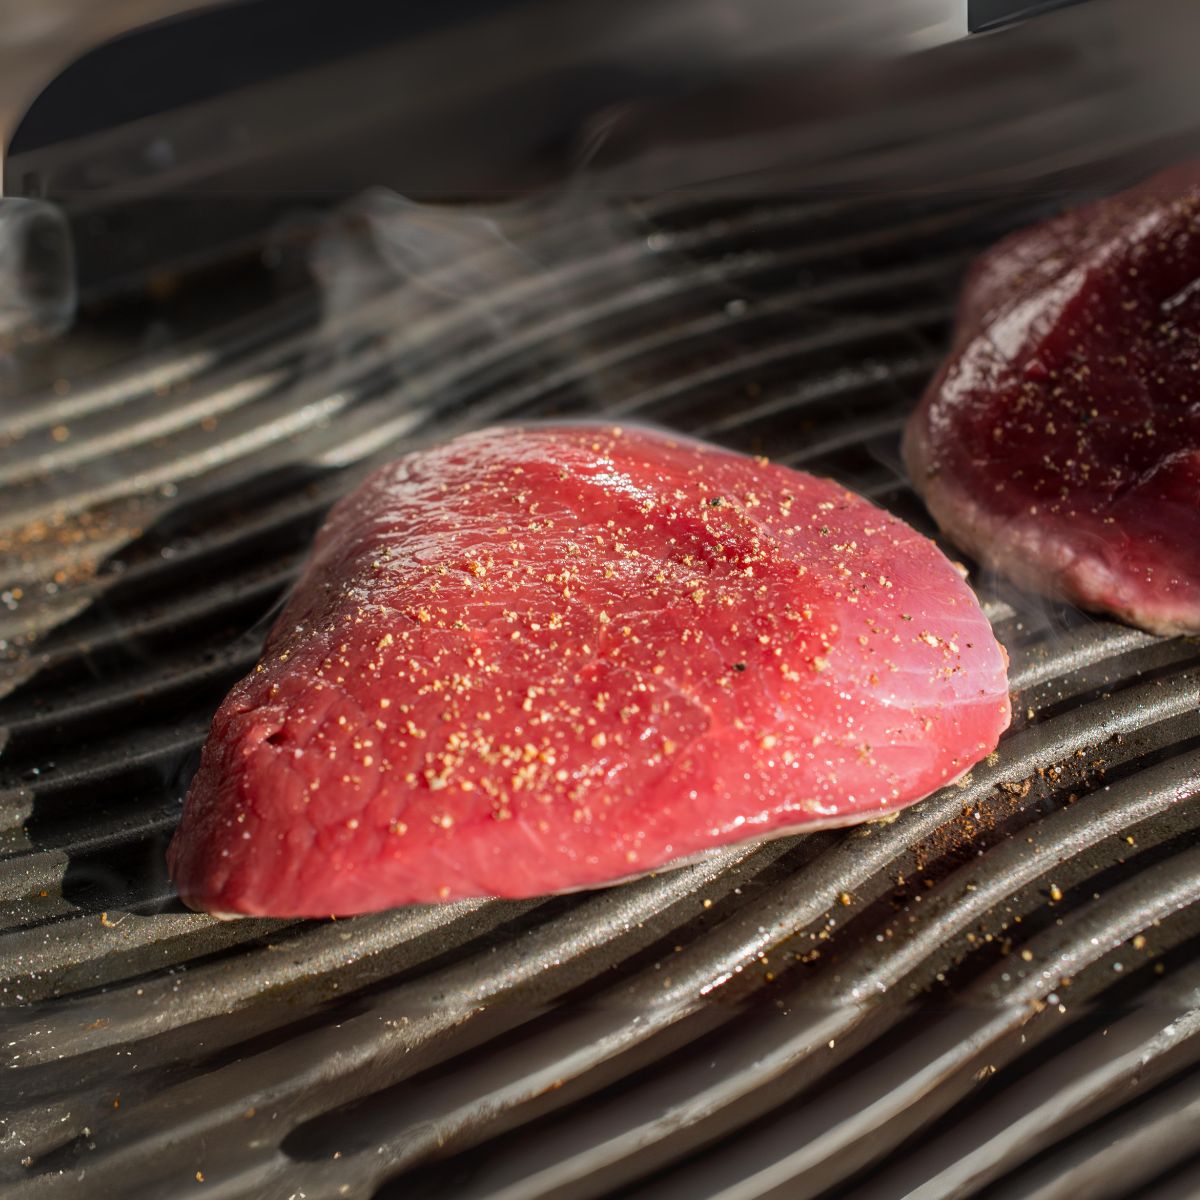
Step 2: Season with Simplicity
When it comes to seasoning venison, simplicity reigns supreme. Do you choose kosher salt with its coarse bravado or sea salt with a hint of oceanic whimsy?
Freshly ground black pepper, on the other hand, is non-negotiable—it’s the perfect companion to elevate the flavor profile of your game without stealing the show.
Step 3: Oiling the Grill
Before the sizzle and crackle ensue, show some love to your grill grates. Anoint them with spent cooking oil and watch as they transform into a non-stick prophet, prophesying perfect grill marks and a crust so divine that it could only result from heeding these venison preparation tips.
Ensure every square inch is perfectly glossed, preventing sticking and inviting that delightful caramelization.
Remember, dear grill master, that this initial preparation dance is as important as the grilling itself. Set the stage correctly, and you’ll be well on your way to venison that beckons for accolades.
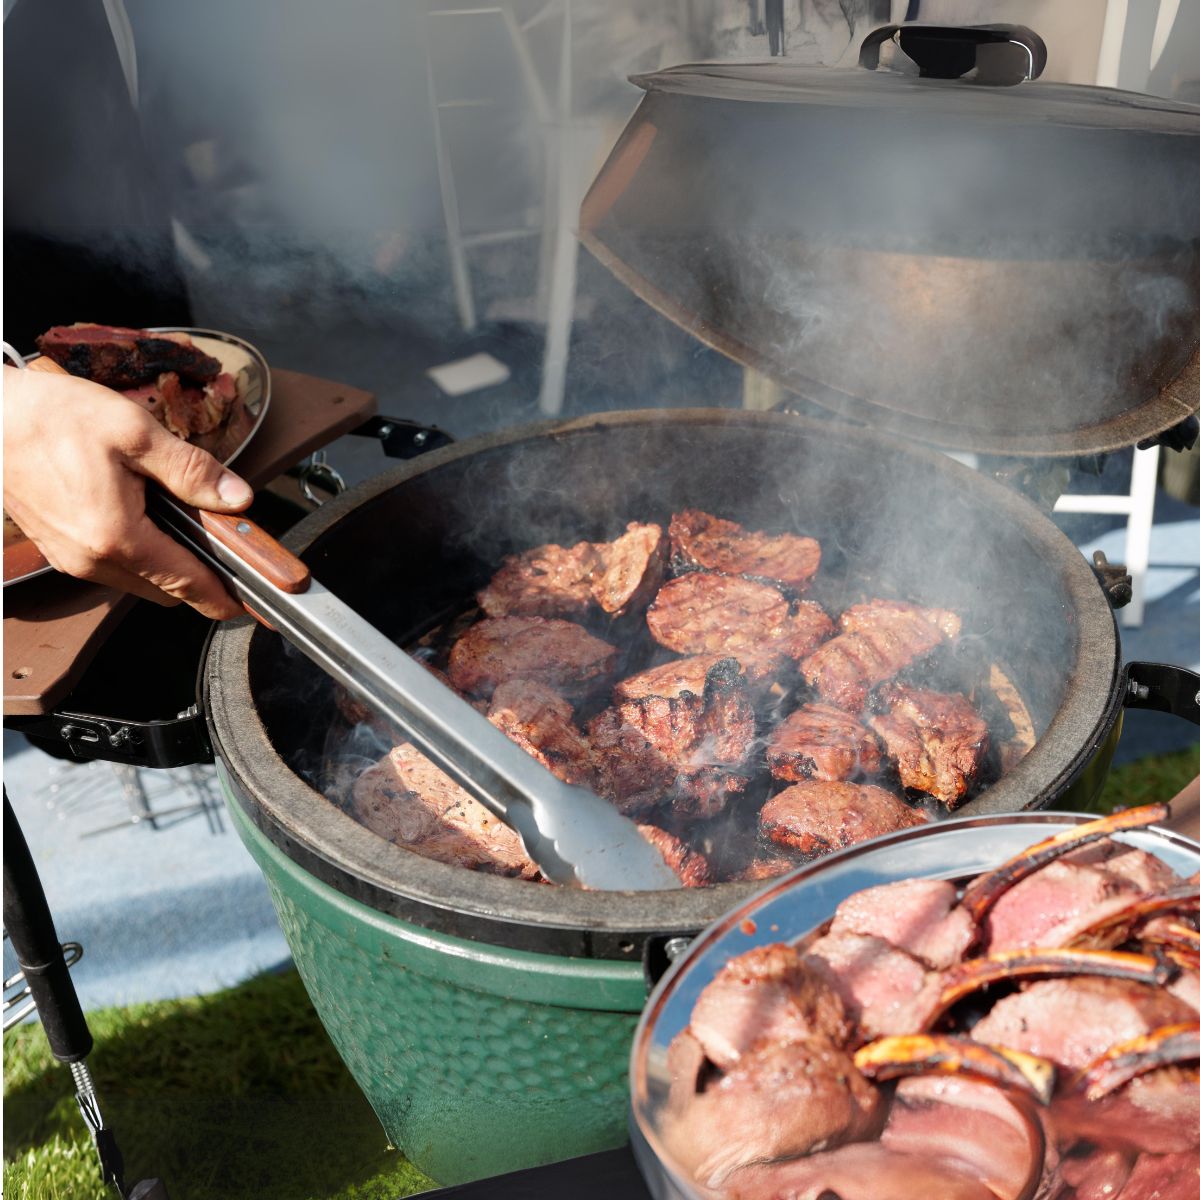
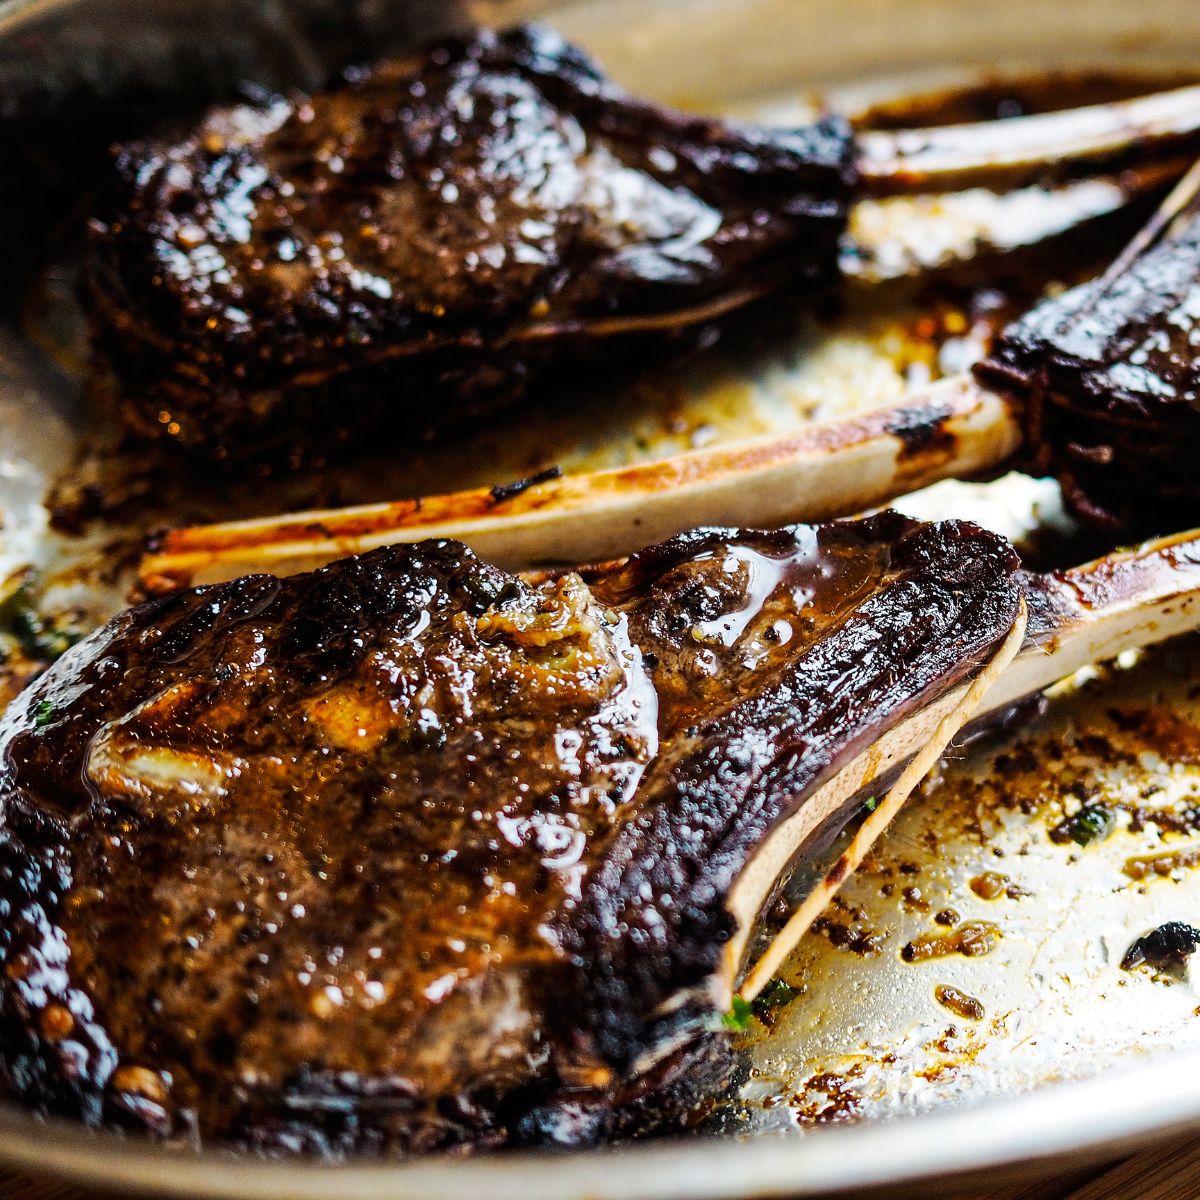
Searing to Perfection: Mastering the Grill Marks
Imagine your guests’ anticipation as they drool over the thought of a perfectly seared venison dinner. It’s not just about the taste; it’s also about that eye-pleasing feast of grill marks that scream culinary prowess.
Fortunately, that’s precisely what you’ll deliver. Here’s how to sear and celebrate each grill mark like a work of art.
They say perfection can’t be rushed, and these are words to live by when it comes to searing venison. You’ll learn why high-heat patience is your new best friend and how your timely flip technique will put those grill marks on the map.
High Heat and the Importance of Patience
Now, let’s turn up the heat, literally. Cranking your grill too high is not for the faint-hearted, but it’s precisely what the venison ordered.
Let that grill get smoking hot; we’re targeting temperatures that make lesser meats cower. But here’s the kicker: once that venison hits the grill, hands off!
Let it sizzle, and let those grill marks techniques work their magic. Remember, your patience will be rewarded with a sublime sear—no peeking!
The Flip: Timing and Technique
Keep an eye on the clock! Around the 3 to 4-minute mark, it’s showtime. That’s when your venison should nonchalantly release from the grill, ready to be flipped.
Don’t rush it and don’t be late for this important date. Use tongs—never a fork, we’re not savages—to gently flip that perfectly-seared masterpiece. Do it right, and you’ll be halfway to a flawless finish.
Congratulations, you’ve just upgraded your grill game. Your reward? A perfect sear venison that’ll become the stuff of legends. Remember, it’s all in the technique and, of course, the timing. Grill on!
Controlling the Cook: Direct vs Indirect Heat
After you’ve achieved that picturesque sear on your venison, it’s time to make a pivotal decision: to go with the gusto of direct heat or to shift gears towards the gentler realm of indirect heat.
The choice sets the trajectory for a juicy, delectable success or an overcooked disappointment. Consider this your culinary fork in the road.
Assessing the Sear: Making the Right Call
You’ve done well if your venison steak is sporting a sear that would make professional chefs tip their toques. But don’t rest on your laurels just yet.
An intense sear with caramelized crust might be a sign to switch to indirect heat, giving those fibers some alone time to tenderize without further caramelization.
If the crust is more bashful than bold, keep the direct heat love coming—to a point. A bit more char wouldn’t hurt before you step back, letting indirect heat work its magic.
How Outdoor Conditions Impact Grilling
Believe it or not, even the balmy breeze or the chill in the air have their say regarding grilling. Direct grilling is a hot and fast affair, suited to balmy days when the heat sticks around like a faithful dog.
But the cover might become your new best friend when Jack Frost is nipping at your nose and grill.
Holding in the heat with a covered grill is ideal in colder conditions, creating an oven-like environment that favors the indirect grilling route.
| Grilling Method | When to Use | Meat Texture | Outdoor Temperature |
|---|---|---|---|
| Direct Heat | For initial sear or when crust needs development | Crisp exterior with potential for rare to medium-rare inside | Ideal in warmer conditions |
| Indirect Heat | After a deep sear or to cook evenly without additional browning | Evenly cooked throughout for a succulent texture | Preferred in cooler conditions or to maintain consistent grilling temperature |
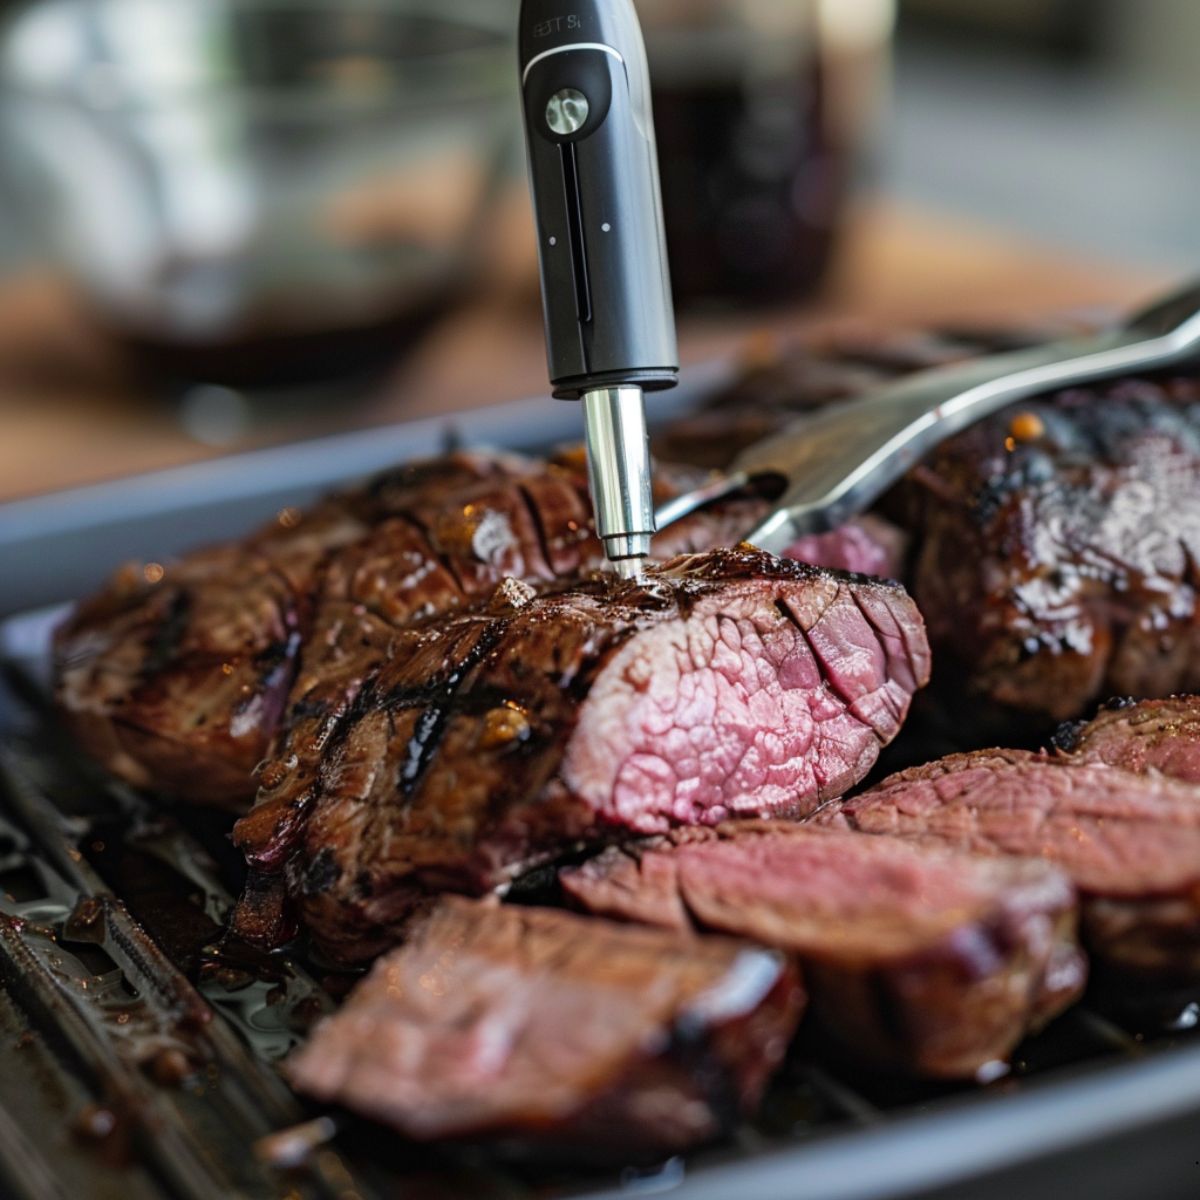
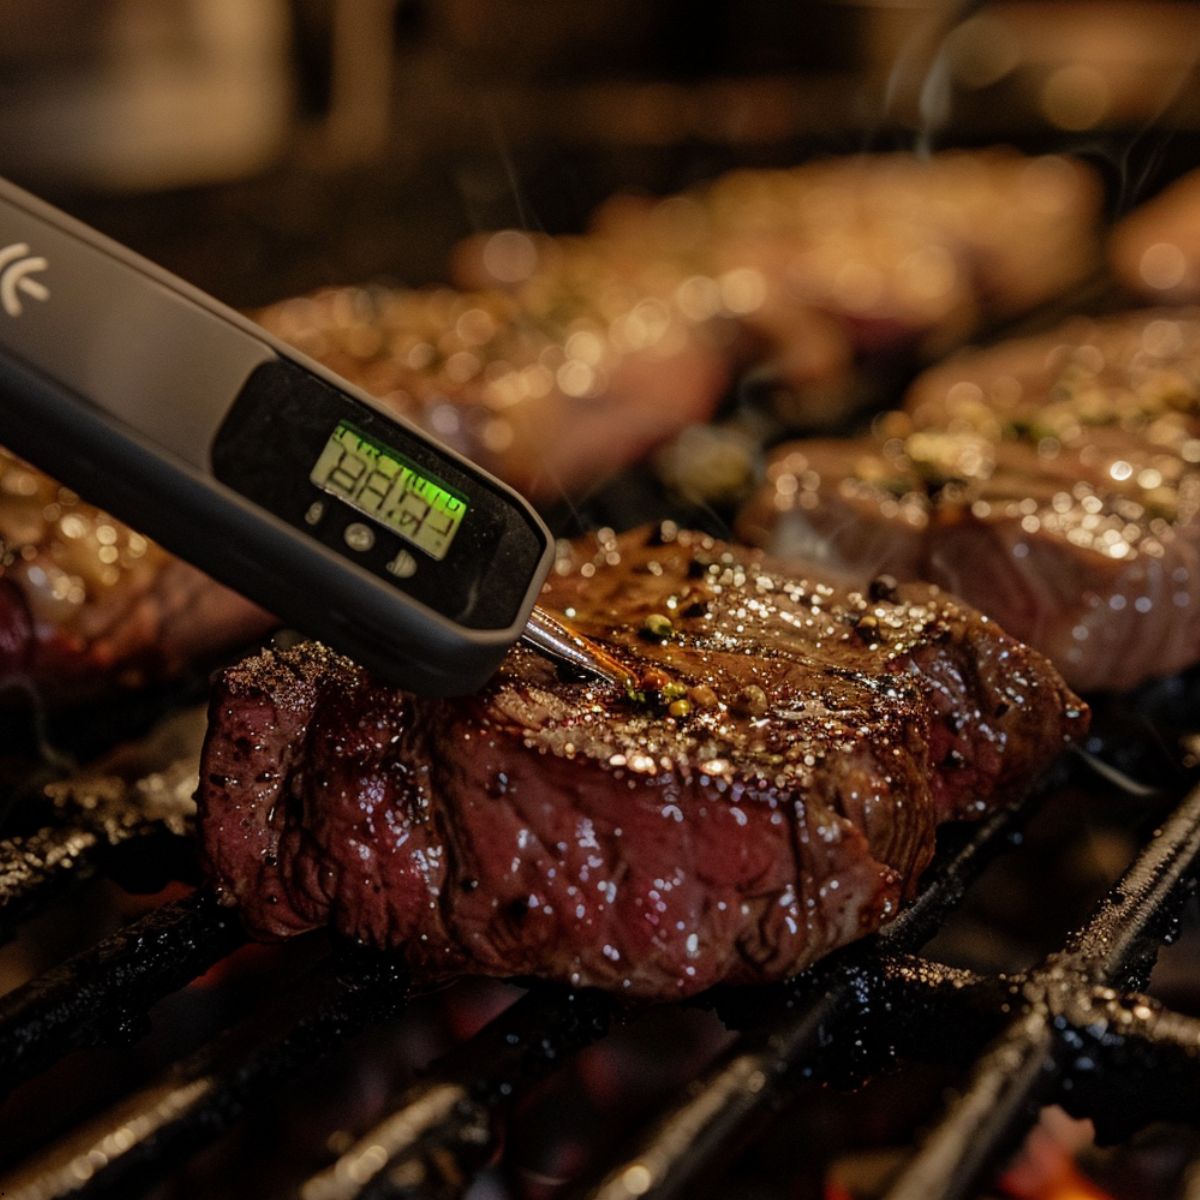
Monitoring ‘Doneness’: The Role of a Digital Thermometer
You’ve got your venison on the grill and already fantasize about that first succulent bite. But hold your horses! The key to not ending up with a piece of meat as tough as leather is mastering the venison cooking temperature.
You say you’re a pro at eyeballing doneness? Well, this isn’t the Wild West, partner—it’s time to get precise with a digital thermometer for meat.
Why guess when you can be sure? The guesswork is over. A digital thermometer isn’t just a fancy gadget; it’s your secret weapon in the quest for perfect venison.
Imagine the horror of slicing into your prized cut only to discover the center is overdone. That’s a tragedy you can avoid with just a quick temp check.
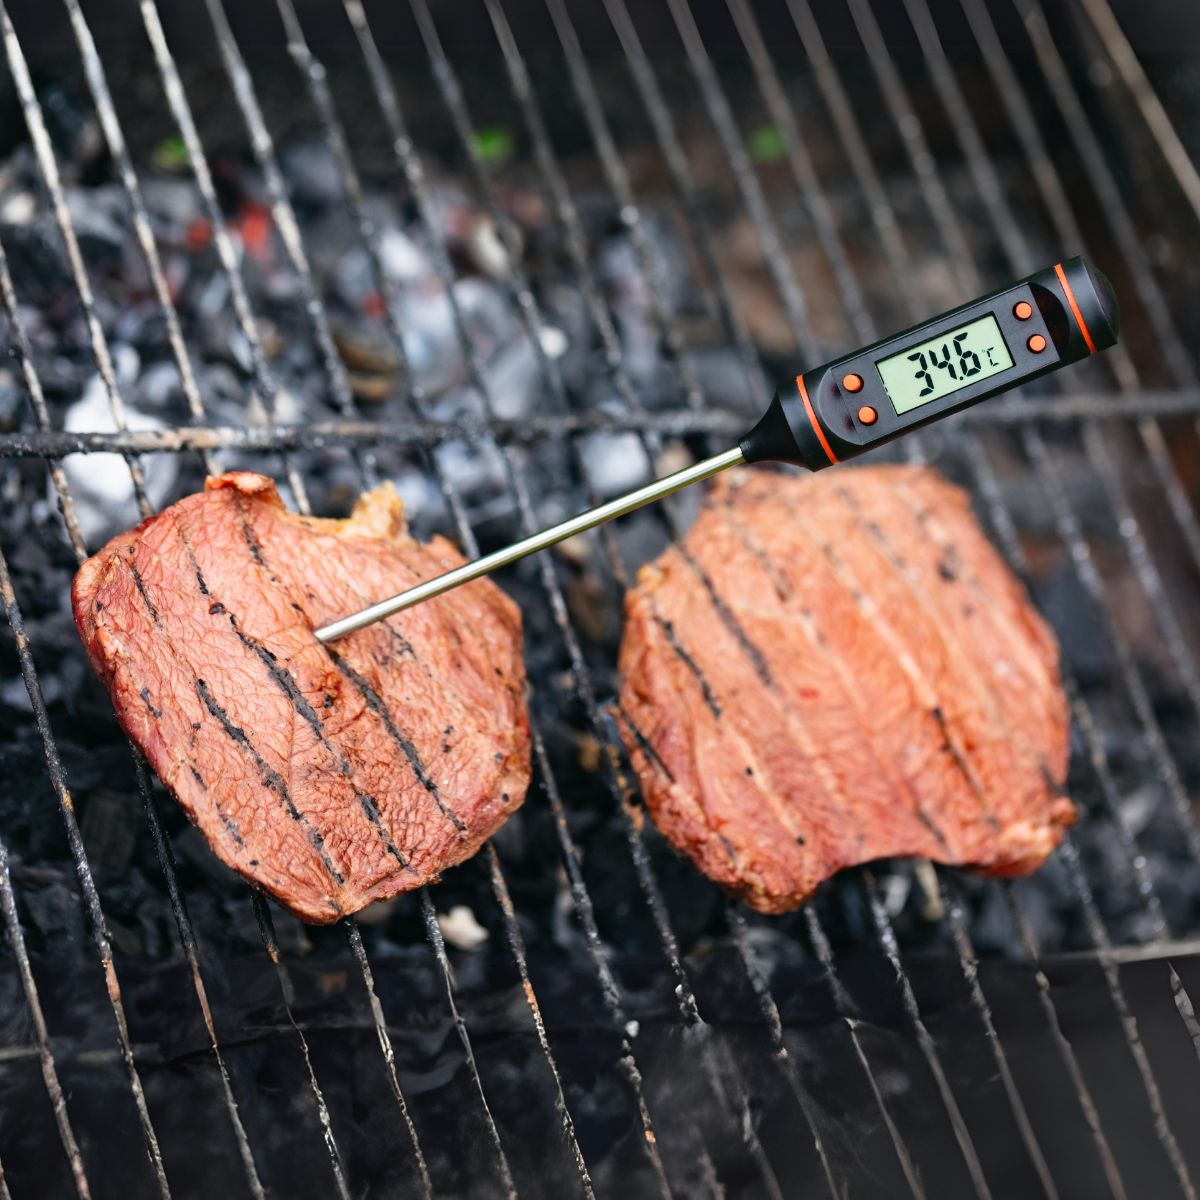
Here’s the juicy scoop: Remove it from the flames when it hits 120° F to guarantee that your venison doesn’t morph into jerky. Now, don’t stray because the journey isn’t over yet.
That venison will keep cooking on its own—a phenomenon known as carryover cooking—until it gracefully lands within the safety zone of 125° and 130° F.
| Doneness | Temperature | Resting Peak |
|---|---|---|
| Rare | 115°F | 120°F – 125°F |
| Medium-Rare | 120°F | 125°F – 130°F |
| Medium | 130°F | 135°F – 140°F |
| Medium-Well | 135°F | 140°F – 145°F |
| Well-Done | Despair | Not Recommended |
Now, brace yourself for a bit of science. The fibers within your venison are like tiny sponges, squeezing and holding onto their precious juices as they heat.
If you snatch your venison off that grill too late, those sponges will turn into wastelands. To avoid a dried-up disaster, keep your digital thermometer ready and probe like a pro.
“In the realm of venison, precision is king, and your digital thermometer is the scepter.”
So there you have it, your trail map to a trophy-worthy venison meal. Frequent checks, not guesswork, will ensure your masterpiece is discussed long after the campfire dies down.
Grab your digital thermometer and cook confidently, knowing you control the venison cooking temperature. Your dinner guests will thank you!
Resting and Final Temperatures
So, you’ve mastered the grill, and your venison boasts that it is the perfect char. Are you eager to slice into that succulent beauty? Hold your horses, chef!
Here’s where you learn the pivotal secrets of the carrying-over phenomenon to lock in that coveted juiciness.
Let’s dive into the art of resting venison for the right time to achieve meat nirvana.
The Science of Carryover Cooking
It’s like a spa treatment for your venison – it needs a moment to rest and soak in its goodness. But why exactly? Thanks to the genius of the carryover cooking principle, the heat built up on the surface needs time to migrate to the center of the meat.
Here’s the deal: resting isn’t just downtime; it’s when the internal temperature can rise another 5° to 15°F, making it critical not to skip this restorative interlude!
Why Temperature Matters
But it’s not just about the wait; the setting for the rest is just as crucial. Always transfer your showstopping venison onto a warm platter. The key is maintaining the warmth without further cooking, setting the stage for all those flavors and juices to redistribute evenly.
This isn’t just pampering; it’s essential. Skipping this step is like forgetting your victory lap after winning the race – utterly unfathomable for the serious chef!
Treat your venison with the respect it deserves and give it the warm, cozy rest it needs. The payoff? A resting venison masterpiece that is juicy, tender, and truly unforgettable.
Now, indulge in the delight of serving a dish that’s rested to perfection – a true testament to your culinary prowess and understanding of the sacrosanct carryover cooking principle.
Avoiding Overcooking Venison
Imagine sinking your teeth into perfectly cooked venison, each bite more succulent than the last. Hold on to that thought because we’re about to dive into the pivotal moment to make or break your venison feast: knowing exactly when to pull that meat off the heat.
Here’s the deal: if you want to avoid the culinary sin of overcooking, you’ve got to be as precise as a hawk eyeing its prey. You might only want an overcooked venison when making venison stew.
The secret? Our trusty ally is the digital thermometer. When that little gadget reads 120° F at the meatiest part, it’s showtime – time to remove your venison from the flames.
| Cut of Venison | Int. Temperature Before Resting | Expected Int. Temperature After Resting |
|---|---|---|
| Backstrap | 120° F | 125° – 130° F |
| Tenderloin | 120° F | 125° – 130° F |
| Rib Rack | 120° F | 125° – 130° F |
| Leg Steak | 120° F | 125° – 130° F |
We all know that patience is a virtue, especially in the kitchen. After removing your venison, don’t jump the gun – let it rest.
This little pause allows for after-cooking heat transference, which is a fancy way of saying the heat keeps cooking even when the fire’s out. It guides your meat to the desired temperatures of venison.
“Pulling out early is better than too late – for venison that is. Remember, timing is everything when aiming for that tender, robust flavor.”
Isn’t science incredible? Especially when it helps you dodge a dry venison debacle. So, keep this knowledge in your apron pocket – and next time you’re at the grill, wield that thermometer like the culinary wizard you are.
Internal Temp of Venison: Nailing the Ideal Range
You know that nailing the perfect desired internal temperature for venison is not just about showing off your culinary prowess—it’s about respecting the game and bringing out its flavors in the best way possible.
To help you perfectly cook your venison, let’s slice right into the meat of the matter.
Desired Internal Temperatures
Medium-rare isn’t just a suggestion for venison; it’s the optimal state of culinary bliss. For this lean marvel, medium-rare means shooting for an internal temperature zone of 125° to 130° F.
The sweet spot ensures your venison is sumptuous and juicy, with just a blush of pink at its heart.
Using Temperature Data to Guide Resting Time
Here’s where cooking becomes less art and more science: resting time. Resting is as essential to venison as fine wine is to a gourmet meal.
So, monitoring the temperature isn’t just about avoiding under or overdoing your venison. The data you collect tells you precisely how long to let your meat relax.
You can gauge the resting time based on how close you are to that desired internal temp. Not enough resting, and you might as well say goodbye to all those lovely juices that make venison so delectable.
| Temperature (°F) | Texture | Resting Time (Minutes) |
|---|---|---|
| 125 | Medium-Rare | 10-15 |
| 130 | On the Edge of Medium | 15-20 |
| 135+ | Medium (and beyond) | 20-25 |
Now that you’re armed with this knowledge, turn that slice of the wild into a meal that’ll approve the legends of yore.
Remember, patience, precision, and the perfect internal temp will have your venison stealing the show—or at least the dinner table.
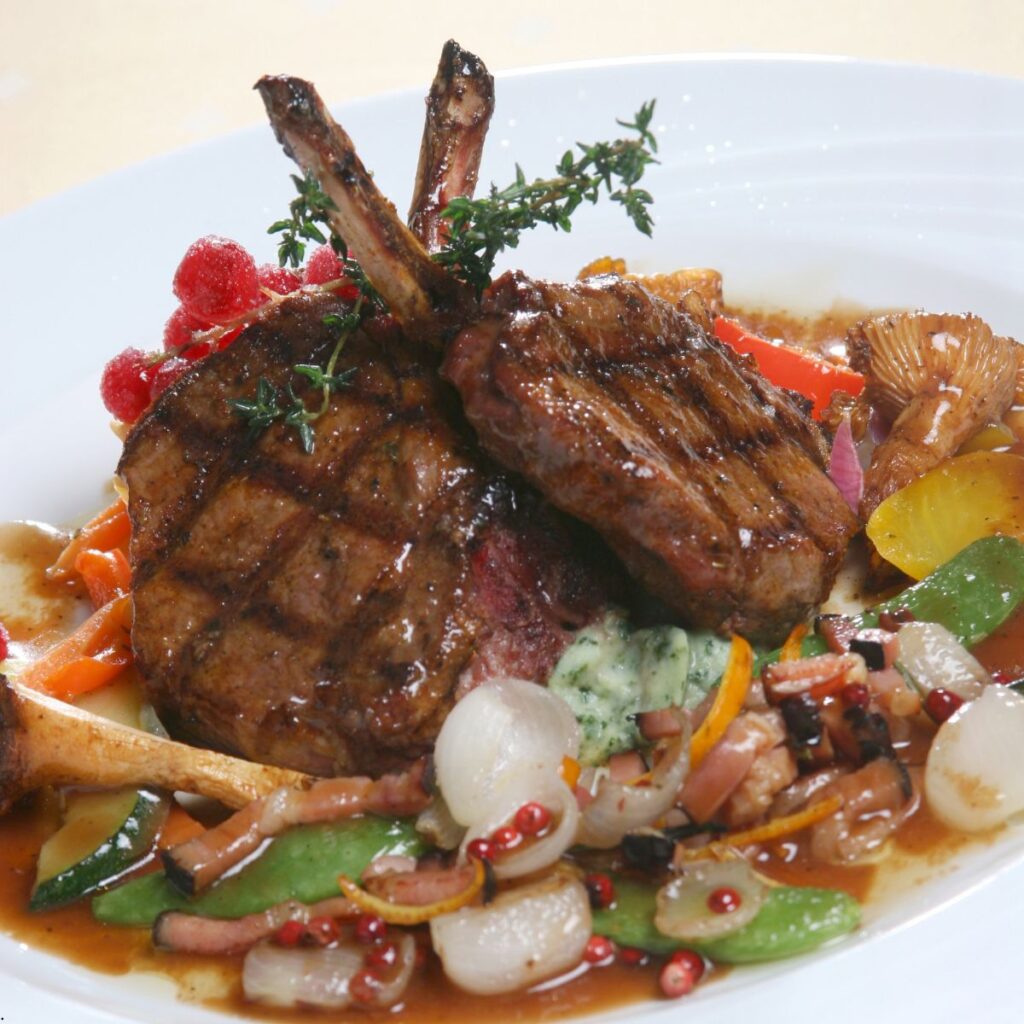
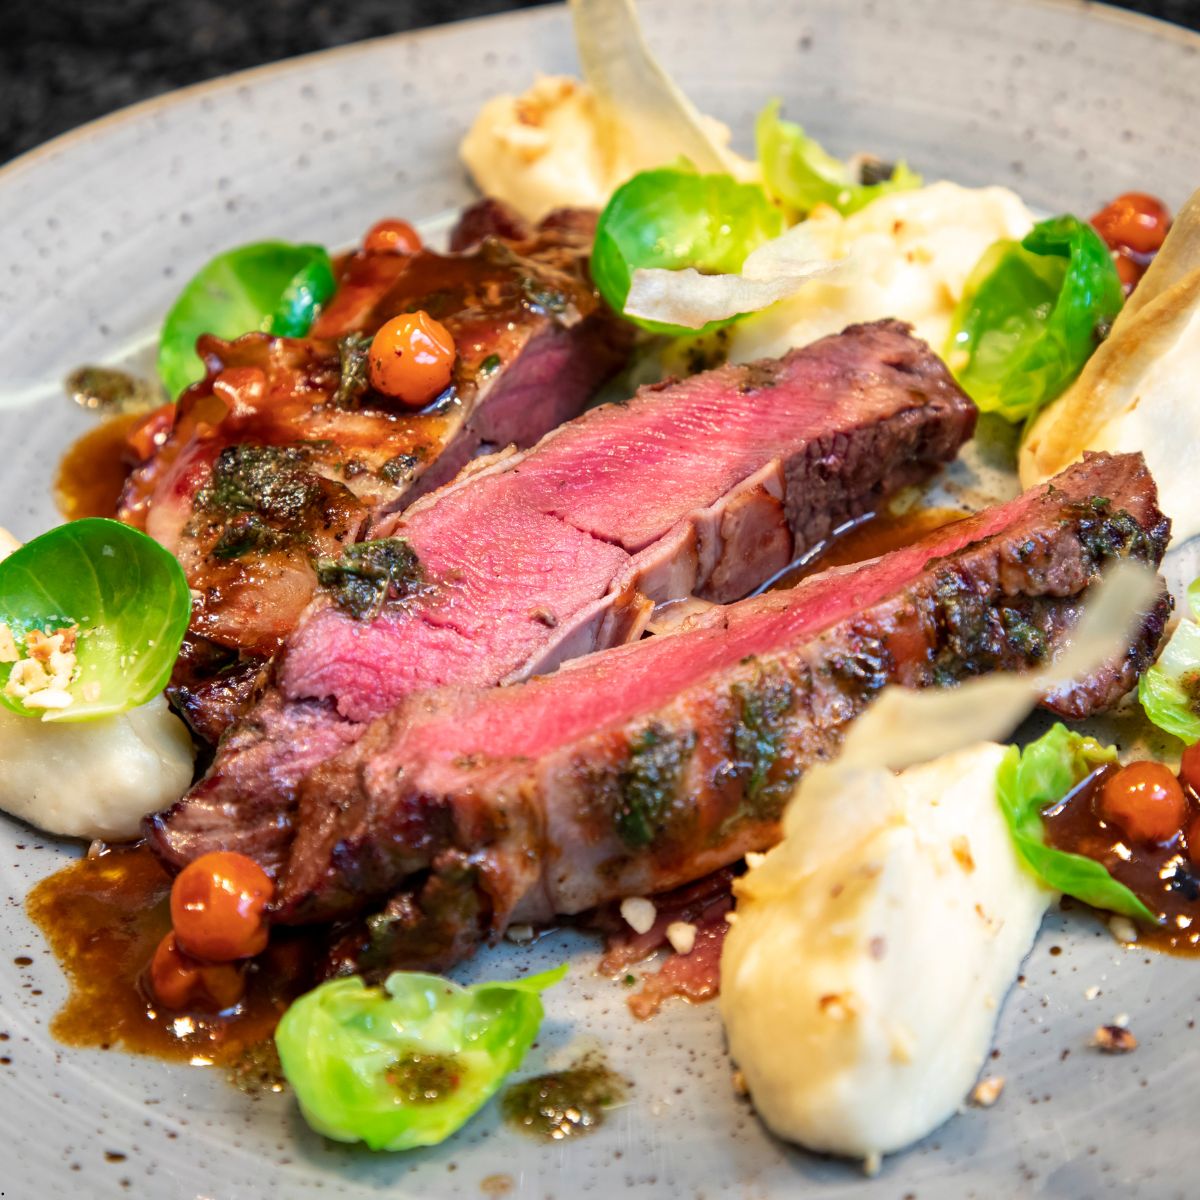
A Sumptuous Finale: Carving and Serving Venison
Now that you’ve grilled your venison backstrap to a seared, succulent delight, it’s showtime. Effective carving venison is more than just slicing; it’s about respecting the meat and elevating your dish to a work of art. Let’s cut into the details.
Carving Techniques for Optimal Presentation
To ensure each slice is as delicious to the eyes as it is to the palate, consider the grain of the meat—your guide to cutting. Slicing against the grain means short fibers in each piece, which translates to tenderness on the tongue.
Aim to carve your venison in thin, even slices, neither too thick to chew nor too thin to savor. The perfect sliver will balance texture and flavor, allowing guests to appreciate the full range of your grilling prowess.
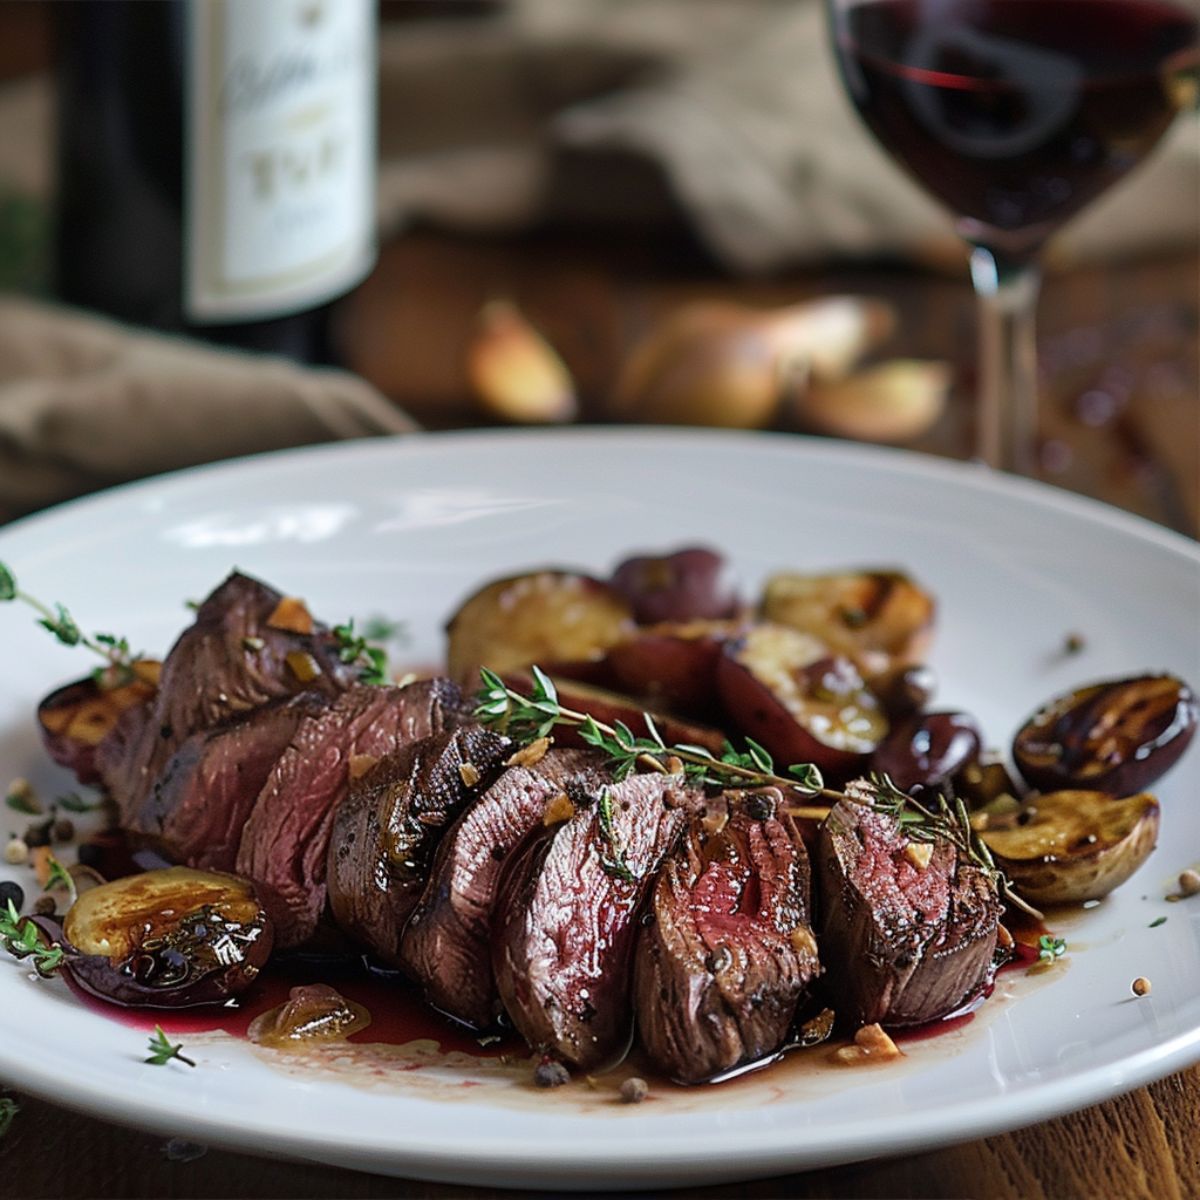
Beverage Pairings for Your Venison Dish
Think of venison wine pairing as seeking a dance partner for your dish. A gulp of Chianti Classico with its cherry notes pirouettes and the richness of venison.
The smoky essence of Rioja coalesces with the charred crust, while a swish of Pinot Noir elevates the gamey nuances beautifully. And for those who prefer hops to grapes, a brown ale brings caramel undertones that support the robust flavors of your immaculate serving venison experience.
Pro Tips For Your Venison Cooking Routine
What’s the secret to mastering venison recipes? It’s not just about following the steps but also about understanding why they are necessary.
Every step has a purpose, from allowing your venison to reach room temperature to letting it rest to perfection on a warm platter.
By holding these pro processes to heart, you transform mundane meal-prep into an open-door adventure to flavor town.
Mastering Venison Cooking Temperatures
Let’s not kid ourselves: The thrill of hitting the perfect medium-rare venison on your trusty digital thermometer is almost as delectable as the dish itself. It’s about the satisfaction of nailing those internal temperatures.
A pride whisked together with skill and care. Serving a succulent venison feast isn’t just about savoring the flavors; it’s a toast to the meticulous care you’ve taken from field to fork.
So go ahead, carve into that masterpiece, and let the fruits—or rather, the meats—of your labor tell a story of culinary mastery.
FAQ
What’s the ideal internal temperature for a perfectly cooked venison?
The sweet spot for medium-rare venison is an internal temperature between 125° and 130° F. Remember to pull it off the heat at 120° F to allow for carryover cooking.
How should I prepare venison before grilling it?
Let your venison reach room temperature for even cooking. Season it with salt and pepper to taste, and pre-oil your grill to prevent sticking and achieve a good sear.
How long should I sear venison, and what’s the technique?
Sear your venison on high heat for 3 to 4 minutes without moving it. It’s ready to flip when it releases easily from the grill, ensuring a flavorful crust without charring.
Which one should I use for direct or indirect heat for grilling venison?
It depends on the depth of the sear and exterior crust you’ve achieved. Use direct heat to develop more crust, and switch to indirect heat to cook the inside without overcooking.
Why should I use a digital thermometer when cooking venison?
Digital thermometers provide the precision needed to avoid overcooking. Frequently check the internal temp to ensure doneness to your liking without sacrificing the meat’s juiciness.
What is carryover cooking and how does it affect my venison?
Carryover cooking refers to the continuation of the cooking process after the meat has been removed from the heat source. It can raise the internal temperature by 5° to 15° F, essential for properly resting venison.
How do I prevent overcooking my venison?
Pull the venison from the grill when it hits 120° F internally. This anticipates carryover cooking during the resting phase, ensuring a juicy medium-rare finish.
What temperature readings should I aim for during the resting phase?
Monitor the venison as it rests, targeting a final internal temperature of 125° to 130° F for the perfect medium-rare venison backstrap. Utilize temperature data to gauge the ideal resting time.
How do I carve venison, and what are the best beverage pairings?
Carve venison across the grain for the best presentation and tenderness. Pair it with a medium-bodied red wine like Chianti Classico, Rioja, Pinot Noir, or a classic brown ale to enhance the flavor if you fancy a brew.
How can professional tips improve my venison cooking skills?
Professional insights, like Evan Barrett’s, can transform your approach to cooking venison – from achieving the perfect sear to carving the meat. These tips ensure an exceptional venison dining experience.
Conclusion
As you’ve journeyed through the subtleties of selecting, seasoning, and sizzling your game, one thing’s abundantly clear—a strategic approach to venison cooking is more than just a flick of the wrist. It’s an art form.
By embracing the venison chef tips and leveraging insights from experts in the field, you can elevate your meals from good to gourmet.
Remember, whether you’re a novice or a maestro at the grill, integrating the meticulous methods of professional venison cooking is the surest path to enchanting your palate with every bite.